
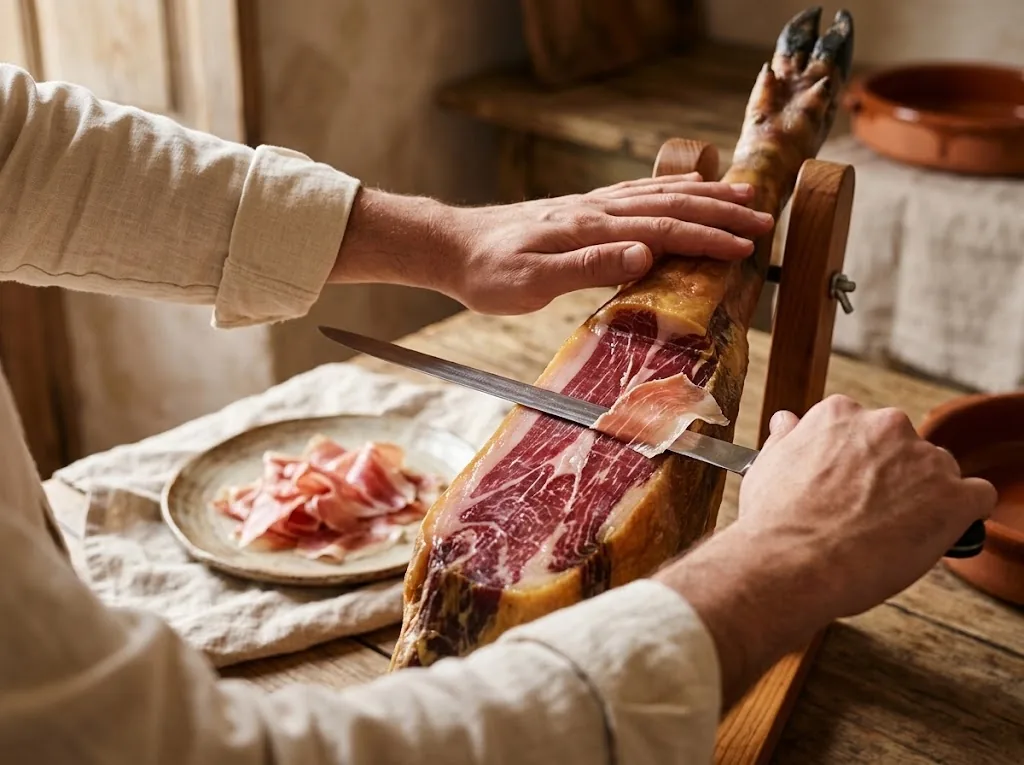
Quick answer: Fix the ham on a stand, let it rest at room temperature for 30 to 45 minutes, trim the rind and yellow fat only from the section you will cut, and slice thin, almost horizontal slices with a long flexible knife. Start with the maza (the wider, juicier side) with the narrow end up if you will finish within days, or with the narrow end down if you will take longer. Never cut toward your body.
In Spain jamón is carved at home, usually in the kitchen, and the plate goes to the table to share. It is a skill you learn in an afternoon and refine for life. You do not need a master’s hands. You need a stable stand, a sharp, flexible knife and the patience to cut a little at a time. This guide walks you through every step: tools, positioning, the first cut, how to slice, how to work around the bone and what to do with the leftovers.
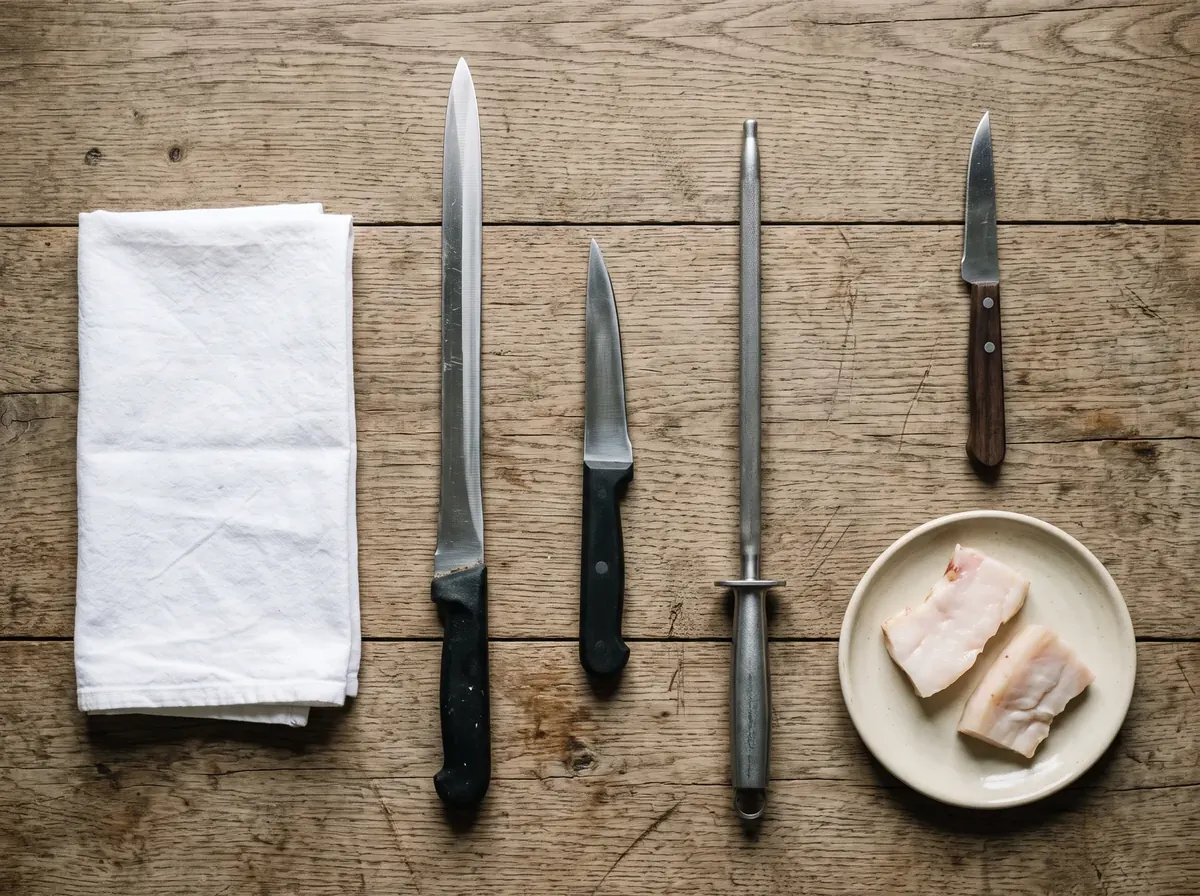
What you need
| Tool | What it does |
|---|---|
| Ham stand (jamonero) | Holds the leg steady so both hands are free. Stability is the first safety tool. |
| Long, flexible ham knife (cuchillo jamonero) | The slicing knife. Long and narrow with a flexible blade for thin, even slices. |
| Short, pointed boning knife (puntilla) | Removes rind, trims fat and works around the hip bone and joints. |
| Honing steel (cheira) | Keeps the slicing knife sharp. A dull knife is the most common reason for ragged slices. |
| Cut-resistant glove (optional) | Protects the hand that holds the ham. |
| Clean cotton cloth and a few pieces of fat | To cover the cut face between servings. |
At Spain at Home we carry wooden ham stands from the classic pine Góndola to a folding stand with non-slip pads for the most stable setup. For knives, the Arcos Niza ham knife or the Arcos Professional ham knife does the slicing; a boning knife handles trimming and bone work and a honing steel keeps everything sharp. Browse them all in ham stands and knives.
Know your ham: the parts
A leg of jamón is not uniform. Each zone has a different texture, fat and curing level, which is why Spaniards talk about the maza, contramaza, babilla, punta and jarrete.

| Part | Where it is | Character | Use |
|---|---|---|---|
| Maza | The widest face of the leg | Most meat, juiciest, most fat infiltration, sweeter | Start here for quick consumption; the best slices |
| Contramaza | Just below the maza, toward the wide end | Meaty and juicy, much like the maza | Carve it after the maza, on the same side |
| Babilla | The side opposite the maza (underneath with the narrow end up) | Leaner, saltier and drier; dries out first | Start here if the ham will last for weeks |
| Punta (culata) | The wide end, opposite the shank | Intense, fatty and salty | Thin slices or small dice |
| Jarrete and caña | The lower leg, toward the narrow end | Firm, fibrous, very flavorful | Dice (tacos) for cooking, or small tapas |
The rule of thumb Spaniards use is simple: eating the ham in the next days or week, start with the maza. Eating it over weeks, start with the babilla, because that leaner zone dries out first and you want to use it while it is at its best.
Step 1: Set up the stand
- Put the stand on a stable, level surface, such as a heavy table or counter. A wobbling stand is an accident waiting to happen.
- Position the ham. Hams sold in the US come with the hoof removed, so go by the narrow end, the shank. With the shank pointing up, the maza is on top. This is the standard position for a ham you will finish soon. For a ham that will last several weeks, put the shank down and begin with the babilla side.
- Tighten the clamp so the leg cannot rotate. Leave enough room to move the knife freely.
- Let the ham rest at room temperature for 30 to 45 minutes before cutting. Cold fat is stiff and does not slice or taste as well; the fat should look slightly glossy.
Step 2: Trim only what you will cut
- Make a shallow circular cut just below the knuckle (the codillo, near the narrow end) so you have a clean starting line.
- With the short knife, remove the rind and the outer yellow fat from the section you are about to slice. Work in small strips. Do not skin the whole ham; the rest should stay protected.
- Leave a thin layer of white fat on the meat. That fat is flavor, and a little will be on each slice.
- Throw away the rind and fat you trim. Do not lay it back on the ham later: cut fat turns rancid within days.
Step 3: Cut the first slices
- Clean the knife and check the edge. Hone it if it drags.
- Hold the ham still with your free hand, fingers safely behind the line of the blade. Always cut away from your body.
- Hold the slicing knife nearly flat, almost parallel to the surface. Use long, smooth strokes and let the blade do the work instead of pressing down or sawing.
- Cut thin, translucent slices, each with a bit of fat. Thick slices taste chewy; paper-thin slices melt.
- Keep the surface flat. Cut in even passes across the area rather than digging holes. A flat surface gives you wider slices and protects the ham.
Your first slices will not be perfect, and that is fine. Lay them on a room-temperature plate without stacking them tightly and enjoy them. You will improve slice by slice.
Step 4: Work around the bone
As you carve deeper, the knife meets the hip bone (cadera) and then the femur.
- Switch to the short boning knife to cut around the bone and free the meat next to it.
- Cut small chunks (taquitos) from the areas where the bone makes slicing hard. They are perfect for croquetas, eggs, lentils and rice.
- Keep the face flat so the next slices come out wide and clean.
Step 5: Turn the ham
When the first side is carved down to the bone, rotate the leg and carve the other face with the same method. If you started on the maza with the shank up, you now work the babilla. As the leg gets thinner, finish the punta and the jarrete by slicing thin or dicing into taquitos.
Step 6: Cover and store between sessions
Always protect the cut face before you stop:
- Lay a sheet of baking paper over the exposed meat like a lid.
- Drape a clean cotton cloth over the paper.
- Return the ham to a cool, dry place away from heat.
Next time, remove the paper and, if the surface has dried, trim the first two or three slices. See our full guide on how to store a whole Spanish ham.
Serving: temperature and plating
- Serve at room temperature, around 68-72 °F (20-22 °C). Cold ham is dull; the fat of Ibérico begins to melt from around 57 °F (14 °C), which releases its aroma.
- Plate in a single loose layer on a room-temperature plate.
- Keep it simple: in Spain jamón is eaten on its own with a few picos (small crunchy breadsticks) or a piece of bread, on bread with tomato and olive oil, or in a bocadillo, a sandwich on crusty bread. For those who drink, a good Spanish wine.
What to do with the bone
Do not throw away the bone. It is one of the best things in the kitchen:
- Stock: simmer the bone for 1.5 to 2 hours with onion, carrot and a bay leaf for the base of lentils, white beans, rice dishes and soups. Our guide to what to do with the jamón bone has the full method.
- Flavor in stews: add a piece of bone to a pot of chickpeas or beans.
- Chopping: the bone is dense, so have your butcher cut it into manageable pieces for the pot with a saw. The bone guide explains how.
Freeze pieces of bone if you will not use them right away.
Common carving mistakes
- Thick slices. If your slice is as thick as a coin, you are cutting too thick. Keep the blade flatter.
- Dull knife. Hone it before every session.
- Skinning the whole ham on day one. Trim only what you will cut so the ham stays protected.
- Cold ham. Let it rest, and serve slices at room temperature.
- Sawing. Long, smooth strokes beat short, hacking ones.
- No cover. Skipping the paper and cloth leaves the ham to dry.
- Unstable stand. If it moves, stop and fix it.
Frequently asked questions
Do I start with the narrow end up or down?
Narrow end up if you will finish the ham within days to a week and want the juicy maza first. Narrow end down if you plan to eat it slowly over several weeks: start with the babilla, which dries out first, and save the maza for later.
What knife should I use to carve jamón?
A long, narrow, flexible ham knife for slicing, a short, pointed boning knife for trimming and working around the bone and a honing steel to keep them sharp. Our Arcos ham knives are a good starting point.
How thin should jamón be sliced?
Thin enough to be almost translucent, with a little fat on each slice. If a slice is chewy, it is too thick. Keep the blade almost horizontal and use long strokes.
Can I carve a ham without a stand?
You can, but we do not recommend it. A leg must be held steady, and a ham on a cutting board shifts, which is a safety risk and makes thin slices hard. A basic stand is a worthwhile investment.
How long does it take to learn?
Most people get tidy, enjoyable slices within the first session, and technique improves with each ham. Do not rush; the goal is flavor, not appearance.
Ready to carve?
Choose your leg from our Spanish hams: Ibérico hams or Serrano hams. A Cortijo de Canata Serrano, 15-17 lb is a forgiving first leg to practice on. Add a stand and a knife and you have the full setup. Not sure which size fits your table? Start with our guide on how to buy a whole Spanish ham.